

How To Draw Anime Hair For Beginners
After 10 years of existence an artist and learning how to depict, there's i thing I know for certain: drawing and coloring anime hair is ane of the best parts of whatever projection! Well, I probably love painting landscape backgrounds a fiddling bit more than, merely coloring hair is a close 2d! Information technology'south been over a year since I adult this technique to color anime hair and not only does information technology await really skilful, it also saves me a lot of time compared to my other techniques! So, today I want to show you lot how to color anime hair using Paint Tool SAI!
Information technology's a very simple, easy and quick technique to color anime hair and I want you to master it! A video tutorial on this same procedure will be available soon!
Notation: this technique may be applied for other programs but it was specially developed for Paint Tool SAI, using the tools included in this program. Yous'll demand to find the equivalent tools for your program of choice.
Footstep 1 – Adding BASE COLORS
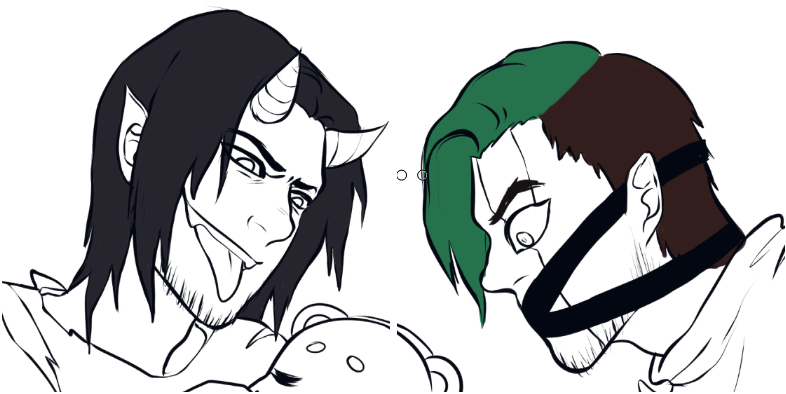
Note: you need to work on a single layer throughout the painting process, you lot tin can't create extra layers or else the colors won't alloy in the fashion they're meant to. Don't worry, it's a very easy anime painting technique! You simply need to make certain you don't become out of the lines OR that the hair layer is blocked to prevent you from colouring out of the base layer.
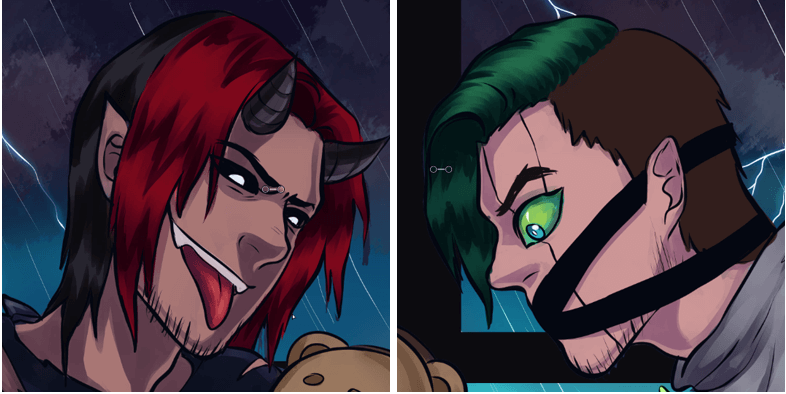
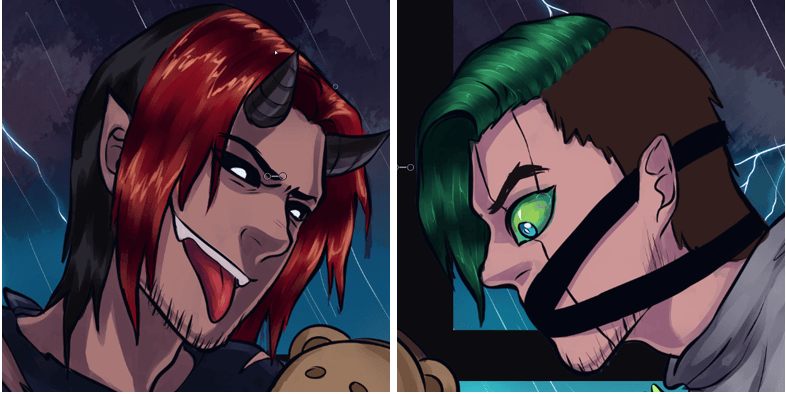
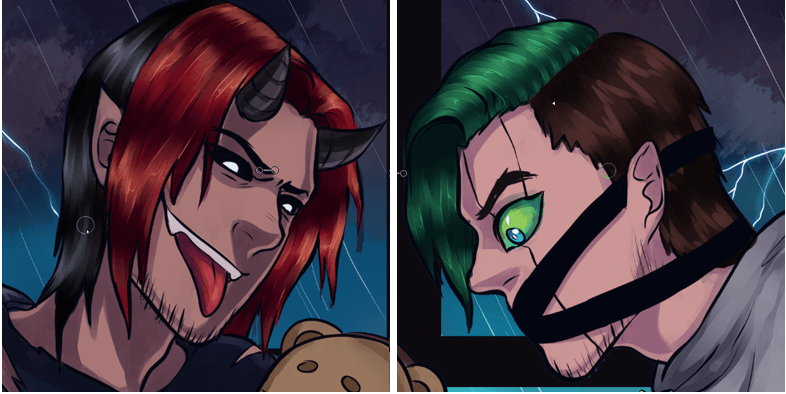
This should be an piece of cake and straightforward step! Fill in the hair with your base of operations colour(s) of choice. Since I'm using i of my favourite fanarts of Darkiplier and Antisepticeye, I'll be using their official colors: black + cerise & green + brown.
Footstep 2 – ADDING THE FIRST LAYER OF SHADING
Now that the base of operations colors are set up, it's time to have fun!
Before we begin, I take a few tips for you:
- This may go against your instinct only… Whenever possible, make certain to paint the background of your epitome first. Why? Uncomplicated: it will assist you know where the calorie-free source is and y'all will be able to adapt the colors to match the ambient light in the piece.
For instance, in this piece, information technology'due south a stormy nighttime in a softly lit bedroom. Therefore, the colors aren't as brilliant and vivid equally they would if they were at the beach in a sunny day. Also, since the groundwork has a lot of blues and purples, adding these colors to the overall shading will help the characters feel like they belong in that setting, rather than look like they were re-create-pasted in it.
- Fix your light source from the offset! Remember of where you desire the light source to be and shade your piece accordingly. If each shade points to a different management, it volition break your piece. Know where the low-cal source is and place the shadows in the places that lite doesn't reach.
Tool: Castor
Settings: Min Size 0% | Density 100% | Shape Stringy_L (simple circumvolve is the default, use it only if yous don't have Stringy_L) | Blending, Dilution and Persistence 8%
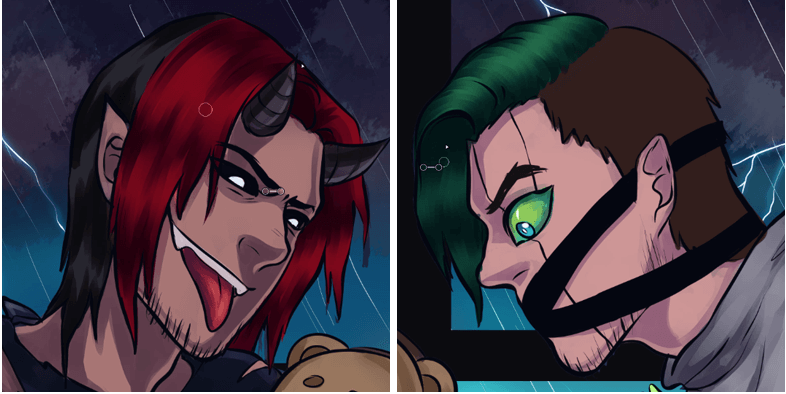
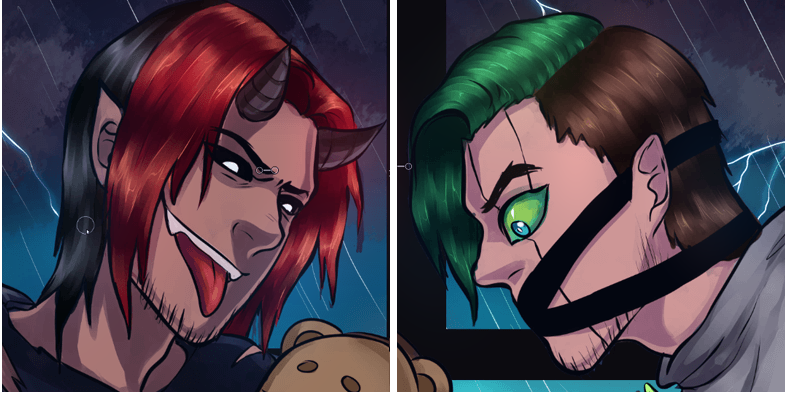
Let'due south go painting! Select a darker hue of your base colour for this. To make it wait more interesting, I didn't pick pure dark red. Instead, I used a nighttime crimson with a slight tint of pink to requite it a purplish feel (re: tip #1!). That helps bring out the hue in the base of operations colour. For the green, I opted for a darker green with a blueish tint to information technology. You tin can practice this through the color bike.
The nigh important affair in this step is that yous follow the menses of the hair! Find how the shading follows the shape of the pilus and caput, curving noticeably at the roots. Follow a pattern to know where to place the shadows: shadow – base color – shadow – base colour – shadow. Repeat that combination throughout the hair.
Notice how each section of shading goes upwardly and downward, near resembling an Thou or W alphabetic character? Doing that helps the shading look more dynamic and realistic.

STEP 3 – BLENDING THE FIRST LAYER OF SHADING
Tool: Brush
Settings: Min Size 0% | Density 100% | Shape Stringy_L (simple circle is the default, use it only if you don't have Stringy_L) | Blending 100% | Dilution and Persistence 8%
We're going to blend in the shading with the base colors now. We practice this by changing the "Blending" settings of the brush from viii% to 100%. Increasing this to 100% makes the brush unable to paint anything new, it can only merge and blend in the existing colors in the layer.
I similar to say this part of the process is like combing real hair, considering you want to brush from the tiptop of the head and downwards, following the shape of the hair. Yous don't have to get all the fashion downwardly in a unmarried combing stroke, feel free to exercise longer strokes mixed with shorter ones to create nice furnishings. Play with it until you like the upshot.
STEP 4 – FIFTY SHADES DARKER
Tool: Brush
Settings: Min Size 0% | Density 100% | Shape Stringy_L (elementary circle is the default, apply information technology only if you don't have Stringy_L) | Blending 8% –> 100% | Dilution and Persistence viii%
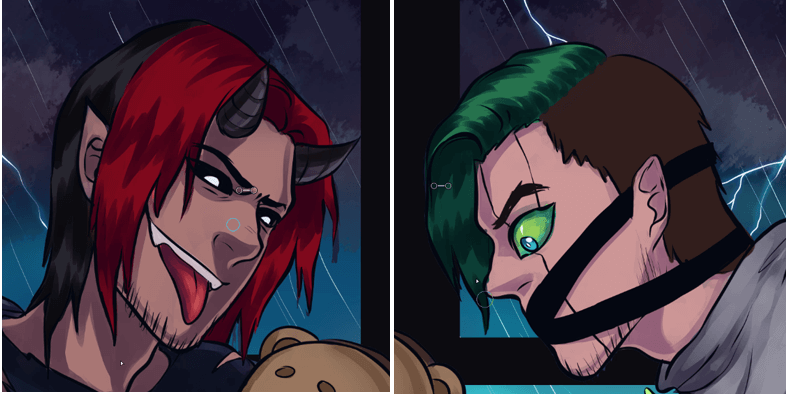
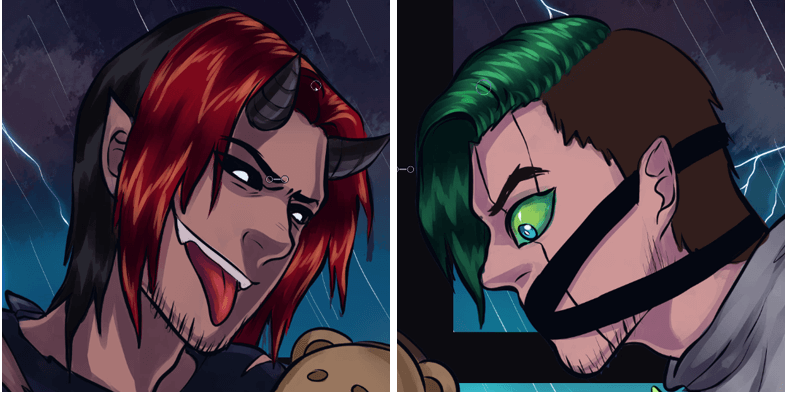
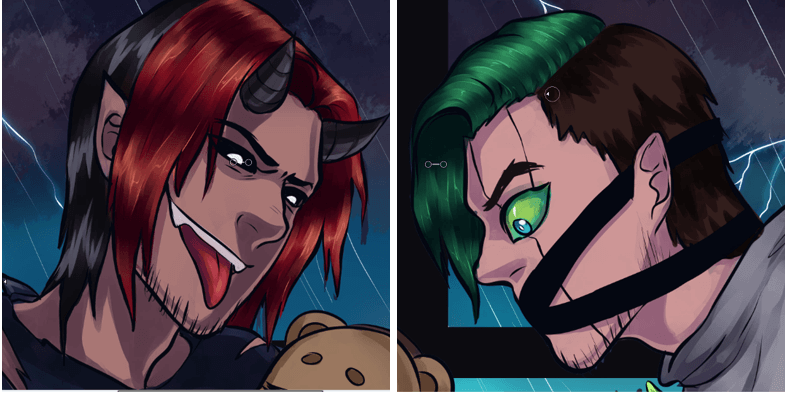
Please, don't kill me for the pun! I couldn't help myself! This step by and large repeats the shading and blending steps we already covered, just this time we're going to utilize darker shades (exercise you lot become the pun now? No? Okay 🙁 ). Sometimes this step won't be necessary, but I usually do it to brand the pilus look shinier by darkening certain parts. And then, like I said, pick a darker colour and repeat the shading in the same areas until the contrast is nice. Remember to prepare the 'Blending' setting of the brush to 8% to paint the shadows and to increment it to 100% to blend them.
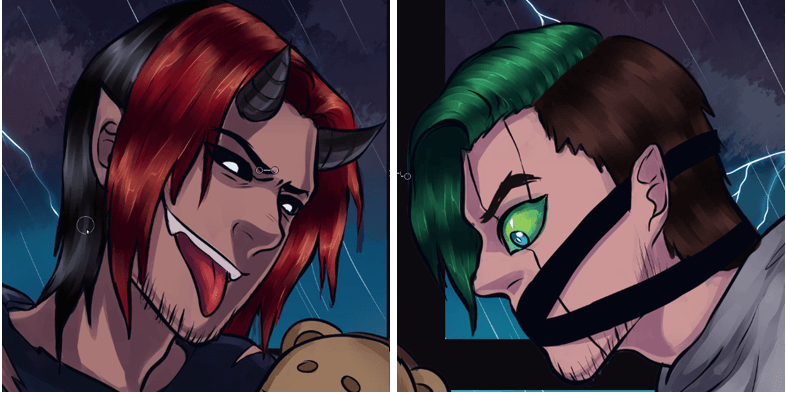
The image below shows how it looks once the 2d, darker layer of shading has been blended! Looking good!
STEP five – Adding HIGHLIGHTS
Tool: Castor
Settings: Min Size 0% | Density 100% | Shape Stringy_L (simple circle is the default, use it but if you don't have Stringy_L) | Blending viii% | Dilution and Persistence eight%
You're doing a bang-up job, friend, keep it up! Soon y'all'll exist able to color anime hair like a pro 🙂
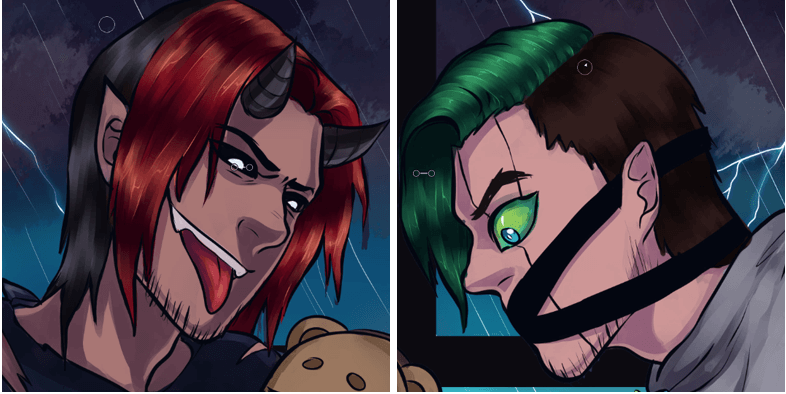
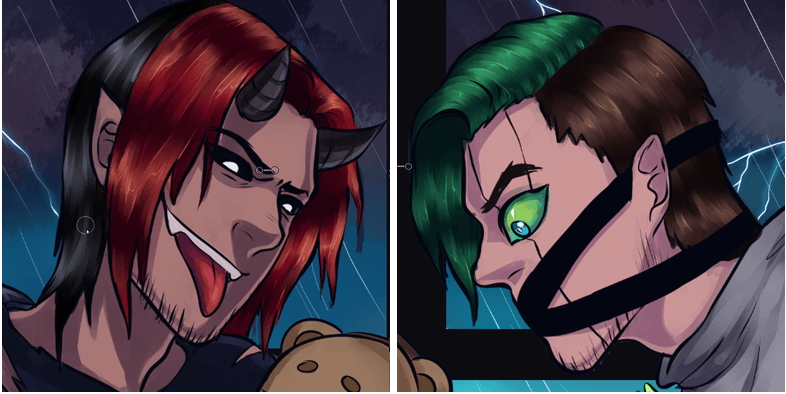
It's time to add together the highlights to our awesome anime hair! Allow's exercise this! Select the brush tool, set the 'Blending' to 8% and reduce the size of the castor, the highlights will exist thinner than the shadows. Paint the highlights above the base of operations colors, not on the shaded areas. Try to follow the pattern created by the shadows whenever possible.
Equally nosotros did before, it'south time to increment the blending to 100% and blend the highlights. Follow the menses of the hair.
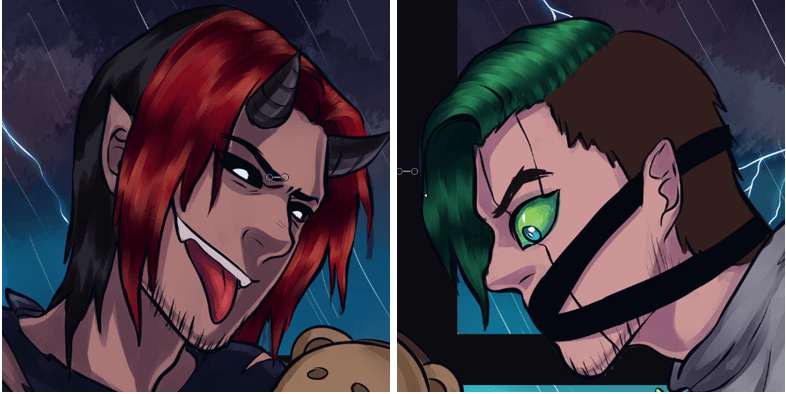
Echo the procedure to brand the highlights more than noticeable! Utilise thinner strands now! Think to add them at the top of the caput, near the roots of the hair. Don't forget to blend them after you've painted them.
Discover: sometimes, depending on the colors y'all're using, adding extra highlights won't be necessary. For instance, I had to practice a few rounds of highlight for Markiplier's carmine hair, but Jacksepticeye's dark-green hair only needed one. Add together more highlights as you see fit!
STEP 6 – ADDING FINAL REFLECTIONS

Tool: Brush
Settings: Min Size 0% | Density 100% | Shape Stringy_L (simple circumvolve is the default, use it simply if you don't have Stringy_L) | Blending 8% | Dilution and Persistence 8%
Now that the highlights are washed, it's time to add the final reflections in that pretty pilus! For this you'll need to use a very small brush, the reflections need to be very sparse, virtually like single hair strands. Place them higher up the highlights you created in the previous step. You don't need to blend these!
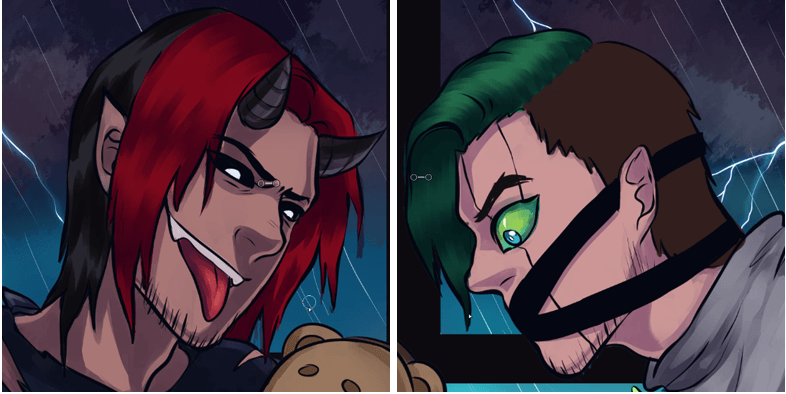
BONUS STEP: Add together LIGHTING EFFECTS
Tool: Airbrush
Settings: Min Size 100% | Density 20% | Blending 8%
Create a new layer and gear up information technology to Luminosity mode (information technology'due south chosen "Improver" in some SAI versions!). Use the Airbrush tool at depression opacity and brush the areas with highlights to bring them out more than and strenthen the sense of volume. Apply the colour of each section for this step! To brand the characters blend in with the background and not look copypasted into it, I used blue and purple in the dark areas of the pilus and pare using the airbrush tool on the layer we set up to Luminosity.
CONGRATS! You DID IT! YOU Tin can At present COLOR ANIME HAIR Like A PRO!
We'll repeat the whole process for the other part of the pilus (black for Markiplier and brown for Jacksepticeye). So, let's recap!
ADDING THE Commencement LAYER OF SHADING
BLENDING THE FIRST LAYER OF SHADING
Since we already used pretty night colors for the initial shading, there's no need to add darker shadows again. Then, we're skipping that step!
ADDING HIGHLIGHTS
BLENDING HIGHLIGHTS
ADDING MORE HIGHLIGHTS

BLENDING HIGHLIGHTS AND Adding Last REFLECTIONS
Woohoo! You made it, friend! Told you it was an like shooting fish in a barrel anime painting technique! Yous're now ready to color anime hair using this technique and make information technology look appealing! If you try it allow me know how information technology went!
I'll be reading your comments, allow me know if you take any question or need clarification!

Source: https://paintingdreamscapes.com/color-anime-hair/
Posted by: jacobsfooster.blogspot.com
0 Response to "How To Draw Anime Hair For Beginners"
Post a Comment